
New Home Build Checklist for Canadian Families
Every decision and inspection point from lot purchase to move-in day.
Quick answer
A new Canadian home build follows 7 phases: (1) pre-construction (lot, plans, budget, financing), (2) selections + allowances (finishes, upgrades, change orders), (3) permits + site prep, (4) framing + rough-ins (plumbing, electrical, HVAC, low-voltage, and site utilities while it's already dug up), (5) pre-drywall walkthrough, (6) finishes + PDI (Pre-Delivery Inspection), (7) closing + new-home warranty registration (Tarion in Ontario, provincial equivalents elsewhere). Total timeline: 8–14 months for a custom build.
Want this as a printable PDF? It's free.
We'll email you New Home Build Checklist for Canadian Families formatted for 8.5×11, ready to print.
Building a home is 100+ decisions spread over a year. This checklist keeps them sequenced so you catch problems while they're still cheap to fix — pre-drywall changes cost dollars; post-closing changes cost thousands.
Pre-construction (months −6 to 0)
- Confirm budget with 15% contingency for overruns and upgrades
- Get mortgage pre-approval for a new build (progress-draw vs completion)
- Choose lot: zoning, setbacks, servicing, soil test, grading plan
- Interview 3 builders; check references, warranty coverage, and licensing
- Review plans: room sizes, ceiling heights, window count, storage
- Have a lawyer review the purchase/builder agreement before signing
- Confirm what's included: appliances, landscaping, driveway, deck
Selections + allowances
- Book design-centre appointments before the structural-change cutoff date
- Get the allowance schedule in writing for flooring, lighting, and fixtures — and what happens if you go over
- Track every selection in one document: item, room, brand/model, cost, allowance, overage
- Check lead times on special-order items (cabinetry, imported tile, appliances) against your closing date
- Get every verbal upgrade agreement turned into a signed, priced change order
- Confirm exterior colour and material selections against the neighbourhood's architectural guidelines
Permits + site preparation
- Building permit, plumbing, electrical, HVAC — confirm builder pulls them
- Development charges + lot levies paid
- Erosion / silt control installed before excavation
- Utility locates called (call before you dig)
- Excavation, footings, foundation waterproofing + weeping tile
- Backfill and drainage confirmed before framing
Framing + rough-in stage
- Walk the framed structure — confirm room dimensions match plans
- Verify window and door rough openings are in the right locations
- Confirm stair placement and headroom
- Add nailing blocks for grab bars, towel bars, and curtain rods, and seal the ground-level perimeter against pests, before it's closed in
- Plumbing rough-in: shower valve heights, tub locations, drain lines, garage floor drain, frost-free hose bibs
- Ask your plumber about tankless vs. boiler, a whole-home leak detector (e.g. Moen Flo), and battery-backup vs. water-powered sump backup
- Electrical rough-in: outlet count per wall, switch locations, structured wiring runs, dedicated freezer/garage-fridge circuits, whole-home surge protection
- Wire for smart blinds, a home network/server cabinet, and both gas and electric at appliance locations you might switch later
- HVAC rough-in: register locations, return-air placement, ERV/HRV, shielded thermostat wire, and routing that avoids a condensate pump where possible
- Rough in site utilities while it's already dug up: sprinkler line, French drains, a yard hydrant, and power/gas/sewer to a shed if you're building one
- Insulation type + R-values match code + energy report
Pre-drywall walkthrough (critical)
- Walk with the site supervisor — bring plans and this list
- Photograph every wall cavity (locations of studs, wiring, plumbing)
- Confirm blocking behind toilets, grab bars, TVs, and range hoods
- Add extra outlets, data drops, or lighting — last chance without cost
- Confirm bathtub / shower pans tested for leaks
- Verify smoke + CO detector wiring per code
- Sign off in writing before insulation goes in
Finishes + Pre-Delivery Inspection (PDI)
- Cabinets, counters, flooring, tile — inspect for damage before sign-off
- Test every switch, outlet, faucet, appliance, HVAC mode
- Open/close every window and door; check locks and screens
- Look for drywall pops, seams, paint touch-ups, caulking gaps
- Confirm all keys, remotes, manuals, and warranties handed over
- Note every deficiency on the PDI form — this is your warranty starting point
- Ontario builds: understand the Tarion 30-day, year-end (12-month), and second-year (24-month) claim windows
Closing + move-in
- Final walkthrough day of closing
- Utilities transferred: hydro, gas, water, internet
- Update address: CRA, driver's licence, insurance, banks
- Change locks or re-key on day one
- Test smoke + CO alarms; note the model + battery date
- Photograph every room at move-in for insurance baseline
- File the PDI form + register warranty (Tarion or provincial equivalent) within the deadline
Practical tips
- Visit the site once a week during framing — mistakes are cheapest to fix when the wall is still open.
- Keep every email and change order in one folder. If it isn't in writing, it didn't happen.
- Never waive the pre-drywall walkthrough. That single hour prevents 10 years of 'I wish I'd added an outlet there'.
- Treat every allowance as a minimum, not a budget — flooring and lighting are the two categories buyers go over most often.
This page is free. Here is what CA$12 adds.
Every phase from land search to move-in, tailored to your build.
Free · this page
New Home Build Checklist for Canadian Families
- Every item on this page
- Printable PDF by email (free)
- Same list for every household
- No spreadsheet to track progress
Personalized · CA$12 one-time
New Home Build Checklist
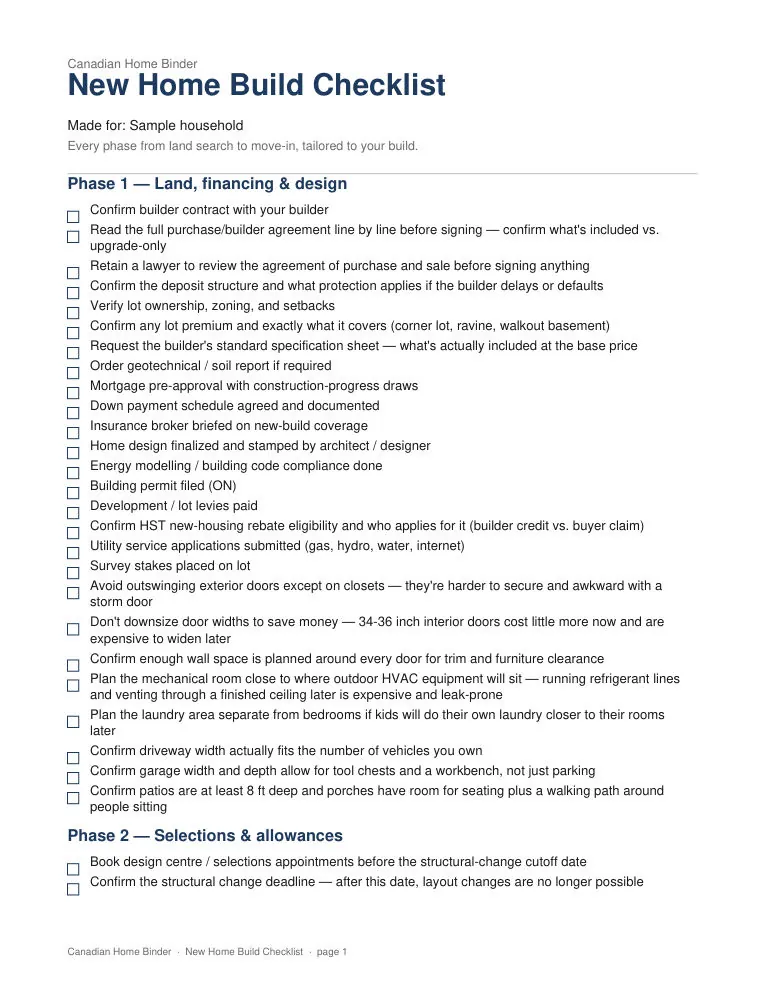
- Built from 10 quick questions about your home
- Only the steps that apply to you, in your order
- Printable PDF, formatted for 8.5×11
- Editable Excel / Google Sheets tracker
- Regenerate any time for 30 days
PDF ExcelReady in seconds after checkout14-day make-it-right guarantee
Get the free PDF first and we'll email you 15% off the personalized version (New Home Build Checklist).
Get the Complete Canadian Life Admin Bundle
Get every binder and every personalized checklist we offer. Your bundle includes personalized versions built around your household, plus the original ready-to-use binder PDFs.
Shop the BundleFrequently asked questions
A production/tract build runs 6–9 months from permit; a custom build runs 10–14 months. Weather, trades availability, and change orders extend timelines.
Related checklists
- Change of Address Checklist for Canadian Households
Every organization that needs your new address, grouped so you can knock off a section per evening.
- The Ultimate Printable Home Moving Checklist for Canadian Families
Everything to do in the 8 weeks before, during, and after a Canadian move — packing systems, labeling, kids, pets, downsizing, and address changes in one printable checklist.
- Camping Checklist for Canadian Trips
Shelter, kitchen, clothing, and the bear-safe food storage rules Canadian backcountry actually requires.
- First Apartment Checklist for Canadian Renters
What to sort before you sign, what to set up before you move in, and the furnishing list that skips what you don't need on day one.
From the blog
- Smart Home Wiring: Before Drywall Goes Up
The single most common reason a smart switch retrofit fails isn't the switch — it's a wire that was never run. Here's what to plan for while the walls are still open.
- Building a New Home in Canada: Phase by Phase
A custom build is 100+ decisions spread over a year. Here's how to sequence them so the expensive mistakes happen on paper, not in drywall.